Reset Epson T50 and T60 without error 21000068
Here the reset method from Jagdish Rathore:
- Turn off printer and open printer.
- Open your Epson main PCB board. You can view an 8 pin CMOS IC. That is Epson waste ink counter IC and found on all Epson Printer.

- You can reset your printer without any resetter by following these ways.
- Soldering pin no 1,2,3,4 by wire as show in PICTURE and now turn on printer for ”20 second”

- After 20 second turn off printer and remove soldering wire from pin no. 1,2,3,4 ( back in original condition)
- Now turn on your printer
- And now your printer will be RESET


HP Laserjet 4V and 4MV service mode
2. Press the [Form Feed] key, then the [Enter] key. The message SERVICE MODE is displayed briefly, then the printer automatically begins a 05 SELF TEST.
After several seconds, both Control Panel Indicators turn OFF. (The printer may display 02 WARMING UP if it has not warmed up completely.) After the printer has warmed up and passed the self test, SERVICE MODE is displayed.
3. Press [Menus] once to display SERVICE MENU.
4. Once it says SERVICE MENU press ITEM to scroll through service mode items.
To exit the Service Mode press the [On Line] key.
Reset software program for Canon MP198 MP258 MP276 MP496 MP558 MP568 and MP648

Manual Reseting Procedure for Canon S series I320 1255 iP1000 and iP1500
Canon GENERIC "S" SERIES RESET CODE
Waste Ink Counter Reset.
- Turn off the printer.
- Press and hold the RESUME button, then press and hold the POWER button.
- Release the RESUME button, Next press and release the RESUME button two(2) more times in succession. Note: you are still holding the POWER button). The printers carriage will "reset" or move momentarily. If the above was properly performed the printer will enter the "Service Mode".
- Press the RESUME button 4 times, this will select the clear waste ink counter function. The lamp will alternate (change) color with each key press.
- Service/Factory test printout, including ink sensor check.
- EEPRsaya - Info printout.
- EEPRsaya - Initialization.
- Reset the Waste ink counter.
- Printer model setting. (More selections beyond this point - However it is best leave them unaltered - You have been warned!)
Canon PIXMA iP1000
Waste Ink Counter Reset Manual for Service mode
1. Turn off the printer. And disconnect the printer cable.
2. Press and hold the POWER button, turn on the printer.
3. The indicator (L.E.D.) should be green.
4. Press and release the RESUME button , the indicator (L.E.D.) should be orange.
5. Press and release the RESUME button again, the indicator (L.E.D.) should be green.
6. Release both buttons.
Canon PIXMA iP1500
Waste Ink Counter Reset. Manual for Service mode
1. Turn off the printer. And disconnect the printer cable.
2. Press and hold the POWER button, turn on the printer.
3. The indicator (L.E.D.) should be green.
4. Press and release the RESUME button , the indicator (L.E.D.) should be orange.
5. Press and release the RESUME button again, the indicator (L.E.D.) should be green
6. Release both buttons
Canon i320, i255
Waste Ink Counter Reset.
Methode 1: Manual Temporary
1. Unplug power and USB.
2. Open door and hold power button.
3. Connect power.
4. Close door, then release power button.
Methode 2: Manual Temporary
1. Turn off the printer. And disconnect the printer cable.
2. Press and hold the POWER button, turn on the printer.
3. The indicator (L.E.D.) should be green.
4. Press and release the RESUME button , the indicator (L.E.D.) should be orange.
5. Press and release the RESUME button again, the indicator (L.E.D.) should be green.
6. Release both buttons.
E Books How to Refill Toner Cartridge and Inkjet Cartridge
Several printer types that mentioned in this ebook tutorial that is Brother, Canon, Compaq, Dell, Digital, Epson, Hewlett Packard (HP), Lexmark, Okidata, Pitney Bowes, Sharp, Xerox cartridges. If you having priner service station or you are home user you must download this useful ebook because in this contain complete tutorial to refill printer cartridges.
All tutorial on this e-book has completed with the picture so it will make the user can follow the tutorial “how to refill printer cartridges” in this e-book. The e-book tutorial is produced by www.uni-kit.com, If you want to download the e-book you can download from following link (I hope this ebook will helpful and useful for you):
Download ebook Tutorial how to refill inkjet cartridges (for inkjet printer types)
Download ebook Tutorial how to refill toner cartridges (for laser printer types)
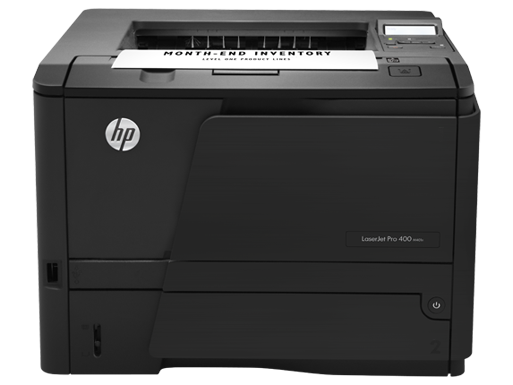
Download HP LaserJet Pro 400 Printer M401n Driver software tools and firmware
Get Printer Driver,
Product Installation Software,
Latest Firmware,
Utility
and Diagnostic Tools.
in the following links below.
Microsoft Windows 8 (32 bit)
Microsoft Windows 8 (64 bit)
Microsoft Windows 7 (32 bit)
Microsoft Windows 7 (64 bit)
Microsoft Windows server 2008 x64
Microsoft Windows server 2008 w32
Microsoft Windows Vista
Microsoft Windows Vista (64 bit)
Microsoft Windows XP
Mac OS X
Linux os
http://h20000.www2.hp.com/bizsupport/TechSupport/DriverDownload.jsp?lang=en&cc=us&prodNameId=5166603&taskId=135&prodTypeId=18972&prodSeriesId=5096252&lang=en&cc=us
Practice in the classroom ink recognition and Microsoft Word in the hand
Before the start of the class, the computer is turned on and the smart Board ™ interactive whiteboard are connected and oriented to make sure. Your interactive White Board on how to start www.smarttech.com/trainingcenter/windows/trainingmaterials.asp for more information that can be used in the quick reference guide, see.
Well assume you have this hand practice Microsoft ® Windows ® operating system, basic understanding of. Usually work way computer classes to go through it is useful to think of. Your computer when you work in, for example, left, right-to-use (s) or double-click, depending on the function that you want to perform. Smart Board interactive whiteboard, the same way. If you think you are confusing, simply about what to do in your computer and the following interactive whiteboard to replication in these tasks. Download Apple iPad 2 hereuser manual
MFC 7420 Install Toner and Drum
Hold down the lock lever on the right and pull out the toner cartridge.
Remove the protective cover.
Insert the new toner cartridge into the drum unit until it clicks into place.
If you have put it in properly, the lock lever will lift automatically.
Clean the primary corona wire inside the drum unit by gently sliding the blue tad from the right to left several times.
Return the blue tab to the HOME position before reinstalling the drum unit and toner cartridge assembly.
Reinstall the drum unit and toner cartridge assembly and close the front cover.Drum:
Open front cover.
Press Options.
Replace Drum 1. Yes 2. No
To confirm you are installing a new drum, press 1.
When the LCD shows (Accepted), close the front cover.